Diy Shaker Cabinet Doors
Sand the front of the door to remove old lacquer dirt or paint. 3 14 thick 225 x 8 wood moulding strips this will depend on cabinet door size and amount of doors but 2 25 wide is about a standard size for the shaker trim.
 Easy Shaker Cabinet Doors Diy Cabinet Doors Shaker Cabinet Doors Woodworking Furniture Plans
Heres how to build shaker cabinets with trim and paint.

Diy shaker cabinet doors. You need some space to work preferably in the garage or the yard. I made two on the short ends and three on the long sides. If playback doesnt begin shortly try.
Sand the front of the door to remove old lacquer dirt or paint. I joined them together with wooden biscuits and glue. DIY Shaker cabinet doors is a project that requires some initial planning.
It took about 2 hours to do all the doors and drawers. If youre new to woodworking then you know what its lik. Lots of browns and tans and I had a light bright airy farmhouse-style laundry room in my mind.
You need to remove the cabinet doors and the hinges from all the doors. Prime all the cabinets drawers and doors. Start with a medium grit paper 120 sanded everything then switched switch sanding paper and repeat.
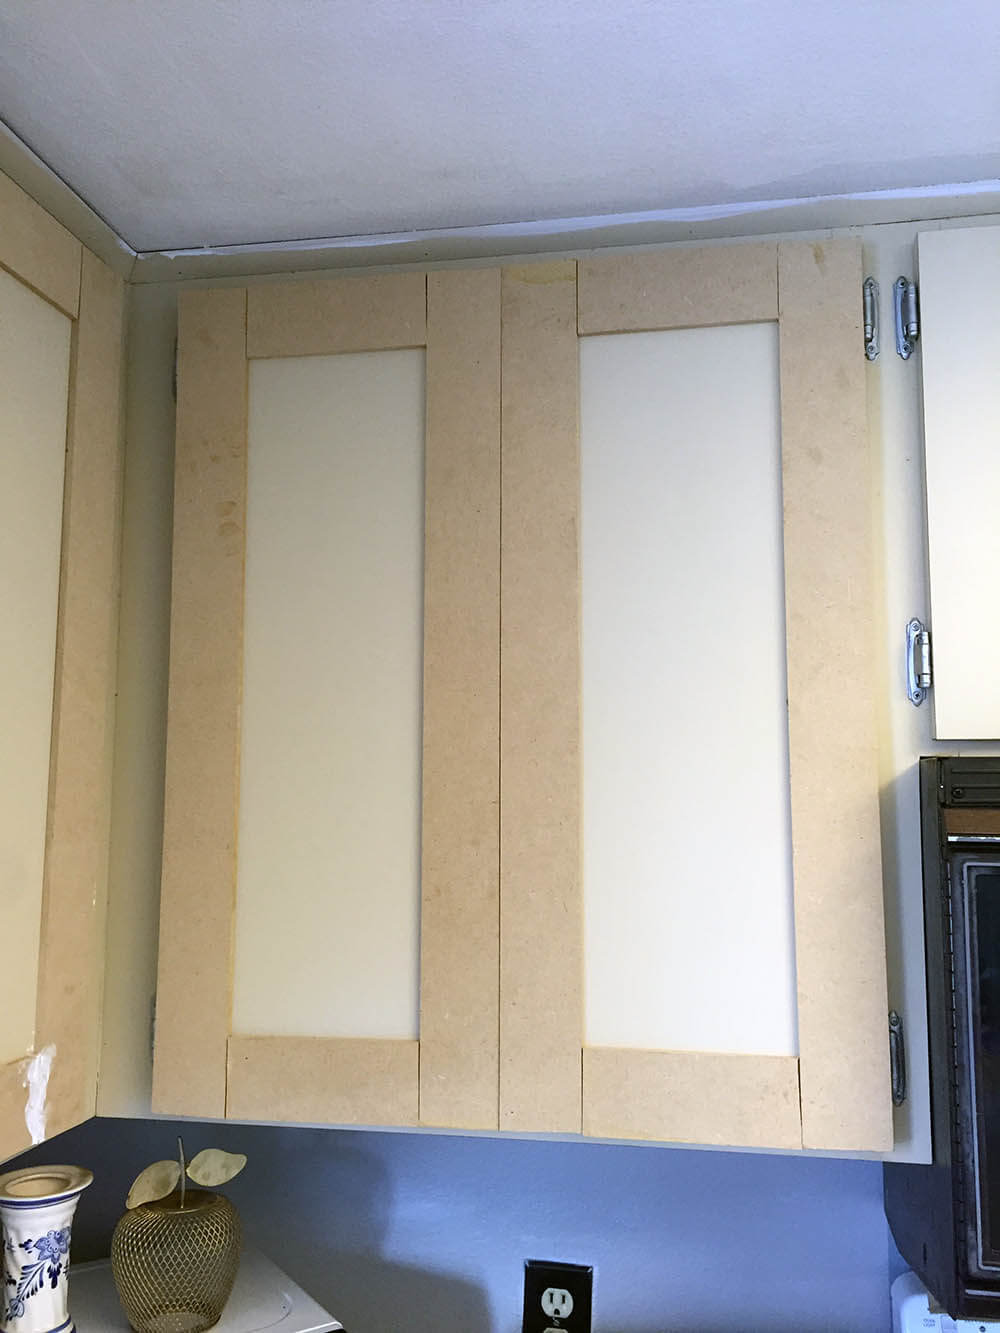
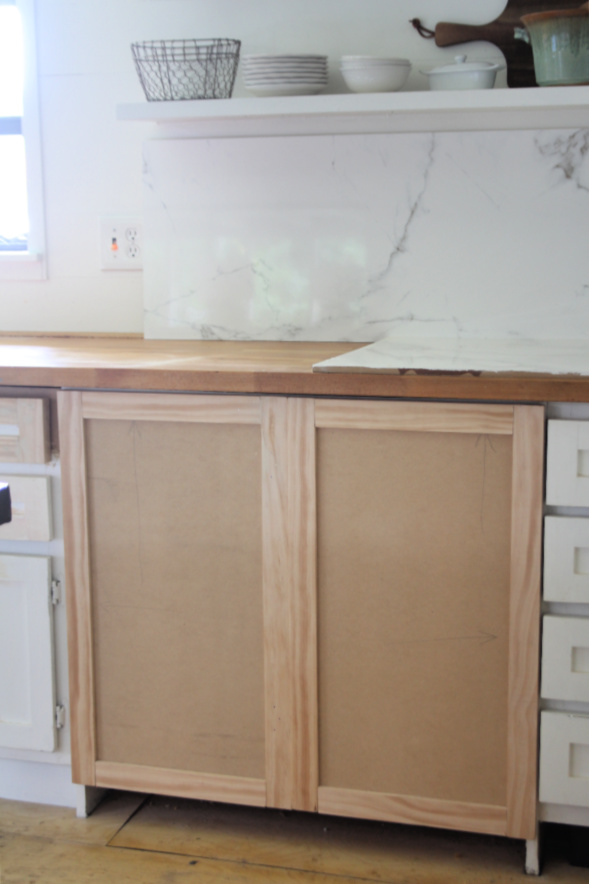
Building DIY Shaker cabinet doors is an inexpensive manner to replace the look of your kitchen shelves lavatory vanities or everywhere you want some new cupboard doorways. Once you have your panel cut make Kreg jig pilot holes following Anas directions. A Kreg Jig makes these shaker style cabinet doors possible without having a router.
My cabinet doors were small however this DIY can be modified to make cabinet doors of any size. So if you are looking for a little shaker style woodwork in your home check out this quick DIY. Everything was just a little blah.
How to Make Shaker Style Doors Woodworking Project DIY CabinetryFollow along as I show you the basics of building a shaker style frame and panel door. Be careful to sand parallel to the grain until the door is smooth. Make sure the foam roller is fully saturated with paint before applying it and then apply like a normal roller.
DIY Shaker cabinet doors step by step instructions. Caulking Wood filler fine sanding block. You need some space to work preferably in the garage or the yard.
Be careful to sand parallel to the grain until the door is smooth. DIY Shaker Cabinet Doors How to Make Your Own for Less. DIY Shaker Style Inset Cabinet Doors - YouTube.
1 and 2 finish nails. Tack cloths will pick up and lint or debris that remains on the surface. DIY Shaker cabinet doors is a project that requires some initial planning.
DIY Shaker Style Inset Cabinet Doors. Make sure you have the Kreg jig to the right setting. I went all the way up to 400 grit paper skipping grits in between Another tip from my contractor friend.
I love how bright and large my laundry room space is in our new home but what I didnt love are all the finishes. Apply the first coat of primer. You need to remove the cabinet doors and the hinges from all the doors.
In todays video Im going to walk you through how to build a Shaker cabinet door with a table saw. I made my doors from pine and plywood without screws.
 Diy Shaker Cabinet Doors How To Make Your Own For Less Farmhouseish
 How To Make Shaker Style Kitchen Cabinet Doors On A Budget My Design Rules
 Diy Cabinet Doors How To Build And Install Cabinet Doors
 Kitchen Hack Diy Shaker Style Cabinets Cherished Bliss
 Diy Shaker Cabinet Doors The Easy Way Mimzy Company
 Mudroom Update Diy Shaker Cabinet Doors Faux Cabinet Remodelando La Casa
Easy Shaker Cabinet Doors
 Miss Dixie Diy Shaker Doors
 Low Country Living Cabinet Doors Cabinet Door Makeover Kitchen Cabinet Doors Diy Kitchen Cabinets Build
 Diy Shaker Cabinet Doors Part 1 Overview Youtube
 Diy Inset Cabinet Doors A Beginner S Way Remodelando La Casa
How To Make Shaker Cabinet Doors With Kreg Jig Crafted By The Hunts
 Diy Shaker Cabinet Door Live Love House
 Remodelaholic How To Make A Shaker Cabinet Door


Comments
Post a Comment